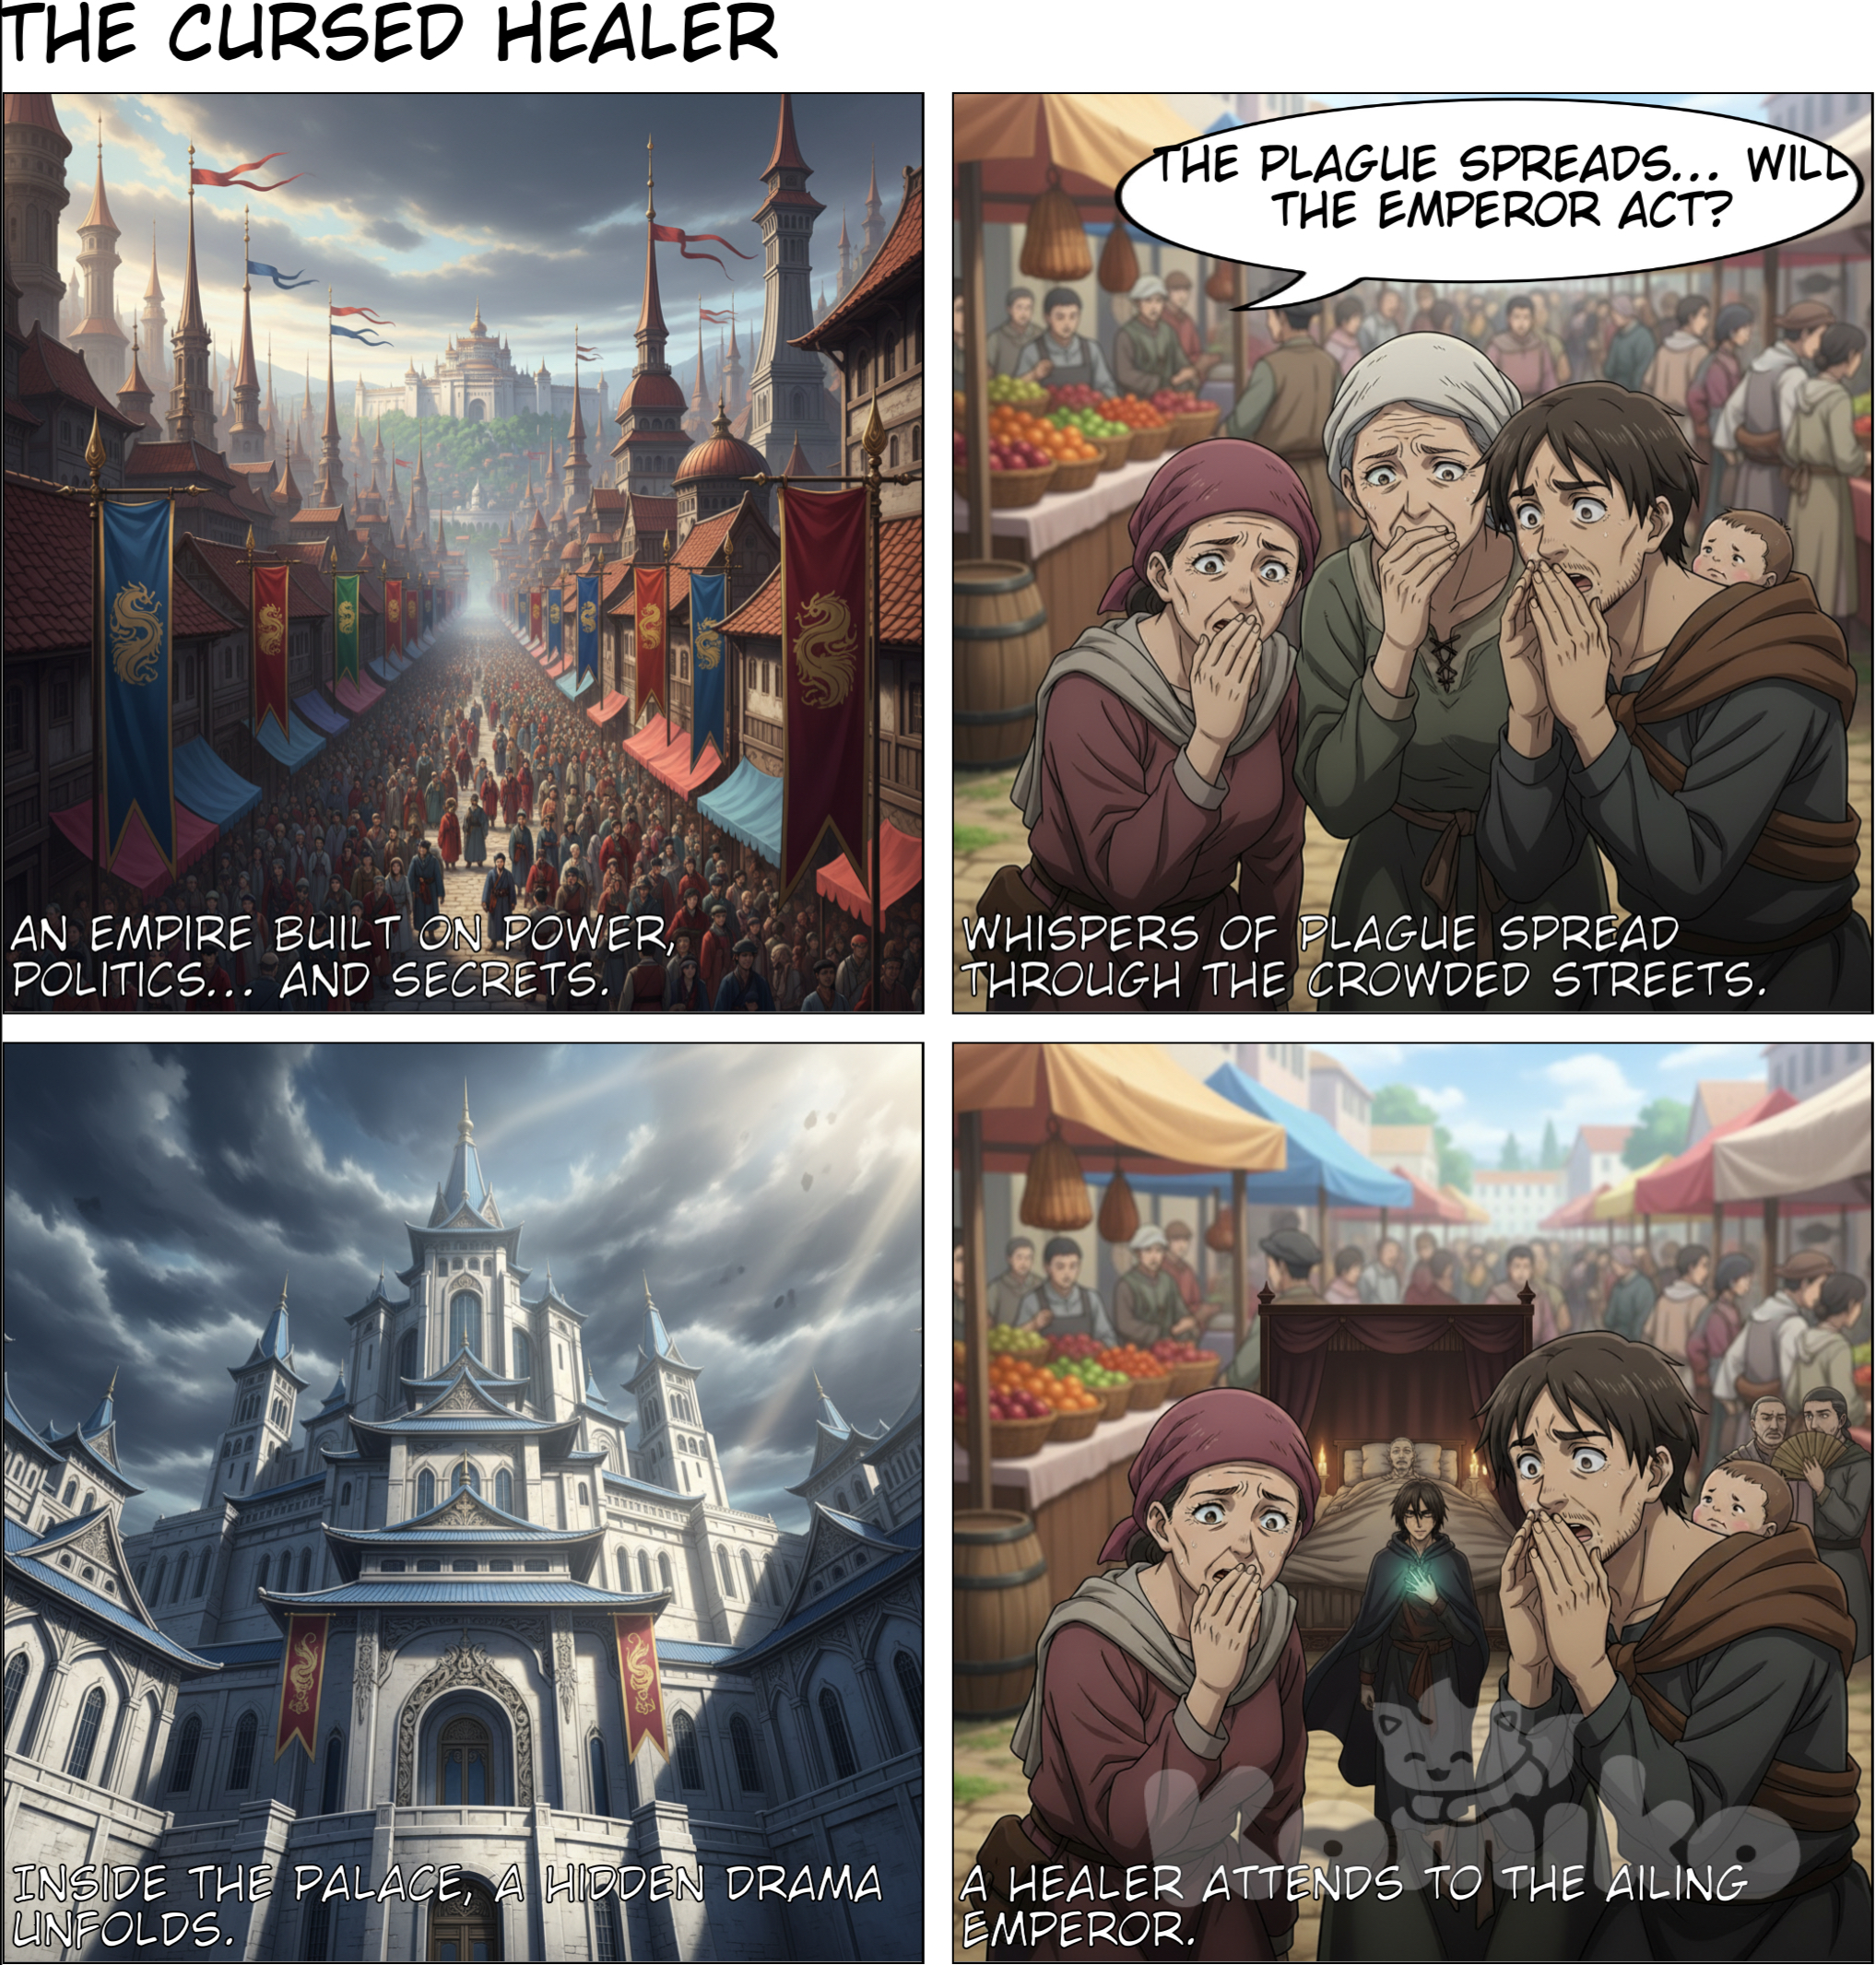
एआई कला: Scene 1: The Empire (Establishing Shot) Panel 1 – Wide shot of the imperial capital: tall spires, crowded streets, banners flying. Panel 2 – Close-up of peasants in a marketplace, whispering: “The plague spreads… will the Emperor act?” Panel 3 – Narration overlay: “An empire built on power, politics… and secrets.” Scene 2: Inside the Palace Panel 4 – Exterior of the palace, dramatic upward angle (to show grandeur). Panel 5 – Dark, candlelit infirmary. A figure (the healer) kneels beside the sick Emperor. Panel 6 – Close-up: healer’s hand glowing faintly, with black vein-like markings crawling up his wrist. Panel 7 – Side view: courtiers and attendants watching nervously, whispering: “That’s him… the cursed healer…” Scene 3: The Healer’s Aura Panel 8 – Close-up of healer’s face, calm but intense. Panel 9 – Small reaction shot: rival physician sneering in the background. Panel 10 – Inner thought bubble from healer: “Even in whispers, their fear is loud.” Scene 4: Tension Rising Panel 11 – Healer steps out of the Emperor’s chamber, cloak swaying behind him. Panel 12 – Two nobles muttering behind fans: “If His Majesty dies… everyone will blame him.” Panel 13 – Close-up of healer’s eyes narrowing, faint smirk. Text bubble: “Let them talk.” Scene 5: Foreshadowing Betrayal Panel 14 – Healer pauses at a palace window, looking over the city skyline. Panel 15 – Narration bubble (his inner monologue): “This empire fears what it cannot understand. And soon… it will fear me.” Scene 6: Cliffhanger Panel 16 – Sudden wide panel: chaos erupts — bells ringing, guards running down corridors. Panel 17 – Servants screaming: “The Emperor! The Emperor—!” Panel 18 – Guards bursting into the healer’s direction, pointing: “It’s him! He cursed His Majesty!” Panel 19 – Dramatic close-up of the healer’s face, shadowed, unreadable expression. Panel 20 (Final) – Black background, white text in jagged bubble: “The Emperor is dead… and it’s HIS fault!”
के द्वारा तैयार sparkly puppy
सामग्री का विवरण
मीडिया जानकारी
उपयोगकर्ता सहभागिता
इस एआई कला के बारे में
विवरण
रचना संकेत
संलग्नता

sparkly puppy
sparkly puppy
Scene 1: The Empire (Establishing Shot) Panel 1 – Wide shot of the imperial capital: tall spires, crowded streets, banners flying. Panel 2 – Close-up of peasants in a marketplace, whispering: “The plague spreads… will the Emperor act?” Panel 3 – Narration overlay: “An empire built on power, politics… and secrets.” Scene 2: Inside the Palace Panel 4 – Exterior of the palace, dramatic upward angle (to show grandeur). Panel 5 – Dark, candlelit infirmary. A figure (the healer) kneels beside the sick Emperor. Panel 6 – Close-up: healer’s hand glowing faintly, with black vein-like markings crawling up his wrist. Panel 7 – Side view: courtiers and attendants watching nervously, whispering: “That’s him… the cursed healer…” Scene 3: The Healer’s Aura Panel 8 – Close-up of healer’s face, calm but intense. Panel 9 – Small reaction shot: rival physician sneering in the background. Panel 10 – Inner thought bubble from healer: “Even in whispers, their fear is loud.” Scene 4: Tension Rising Panel 11 – Healer steps out of the Emperor’s chamber, cloak swaying behind him. Panel 12 – Two nobles muttering behind fans: “If His Majesty dies… everyone will blame him.” Panel 13 – Close-up of healer’s eyes narrowing, faint smirk. Text bubble: “Let them talk.” Scene 5: Foreshadowing Betrayal Panel 14 – Healer pauses at a palace window, looking over the city skyline. Panel 15 – Narration bubble (his inner monologue): “This empire fears what it cannot understand. And soon… it will fear me.” Scene 6: Cliffhanger Panel 16 – Sudden wide panel: chaos erupts — bells ringing, guards running down corridors. Panel 17 – Servants screaming: “The Emperor! The Emperor—!” Panel 18 – Guards bursting into the healer’s direction, pointing: “It’s him! He cursed His Majesty!” Panel 19 – Dramatic close-up of the healer’s face, shadowed, unreadable expression. Panel 20 (Final) – Black background, white text in jagged bubble: “The Emperor is dead… and it’s HIS fault!”
4 months ago